Installation
Getting started with Gamebeast in Roblox is easy. This guide will walk you through the process of installing the Gamebeast SDK and configuring your API key.
If you haven’t created a project in the Gamebeast dashboard yet, please start with the Getting Started guide.
Installing the SDK
Roblox Studio
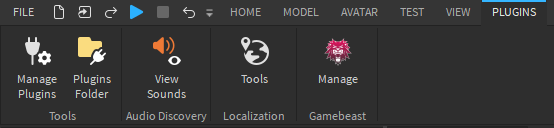
To add the SDK, you’ll first need to install the Gamebeast plugin for Roblox Studio, which can be found here . After downloading, the plugin should appear under “Gamebeast” in the Plugins tab of Roblox Studio.
Next, click the the “Manage” button in the Gamebeast plugin bar. This will open the Gamebeast plugin management window.
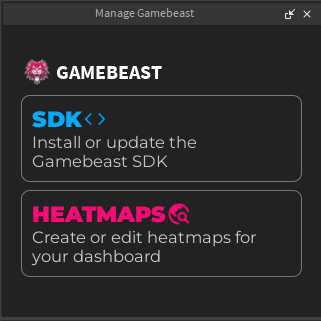
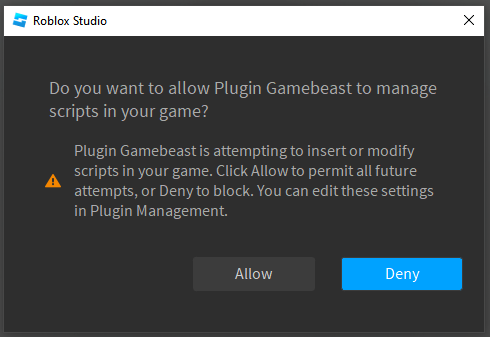
Then, click the SDK button to install our Roblox SDK and Gamebeast module to ReplicatedStorage. You will be prompted to give the plugin permission to insert scripts into your experience, select “Allow”.
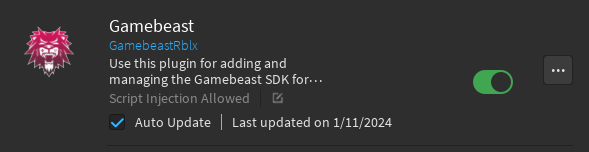
To make sure your Gamebeast plugin always functions properly, navigate to the Plugins tab of Roblox Studio, click “Manage Plugins”, and enable the “Auto Update” option for Gamebeast.
When you open an experience in Roblox Studio that contains the Gamebeast SDK, the plugin will automatically output a warning if your SDK is out of date. Simply click the plugin to update your SDK.
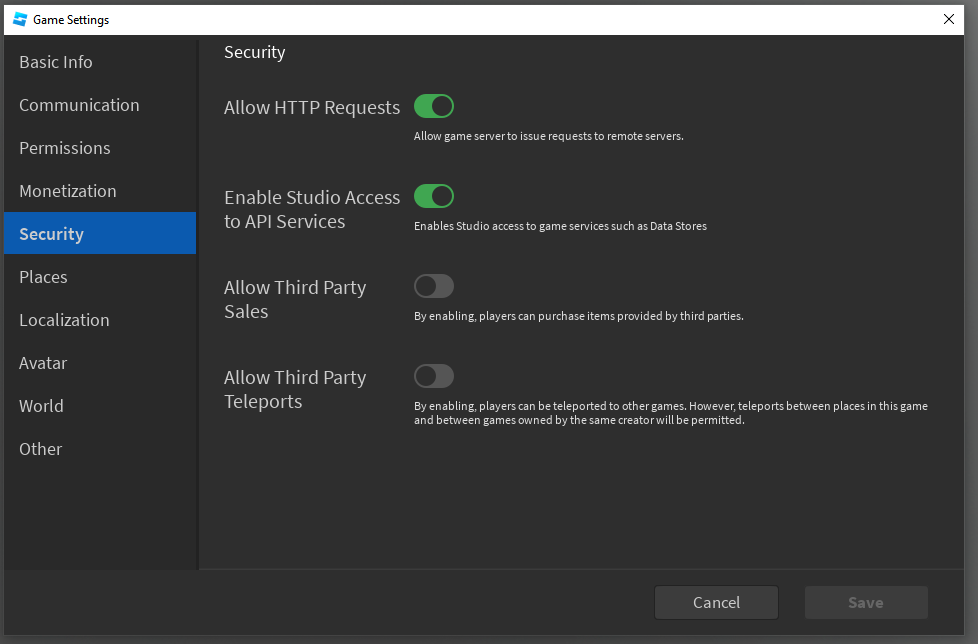
Finally, in Roblox Studio, go to the Home tab and press the “Game Settings” buttons. Under the “Security” tab, enable the “Allow HTTP Requests” and “Enabled Studio Access to API Services” options. This allows the Gamebeast SDK to communicate with the dashboard and use Roblox services for different features.
Start the SDK and Configure API Key
The next step of getting your data on the Gamebeast dashboard is to start the SDK and configure your API key.
To start the SDK, you’ll need to add the following code to scripts in your experience:
Server script, such as a ServerScriptService script:
local ReplicatedStorage = game:GetService("ReplicatedStorage")
local Gamebeast = require(ReplicatedStorage:WaitForChild("Gamebeast"))

Gamebeast:Setup({
    key = "abcd-efgh-1234-5678",
})
Client script, such as a StarterPlayerScript script:
-- Client Script
local ReplicatedStorage = game:GetService("ReplicatedStorage")
local Gamebeast = require(ReplicatedStorage:WaitForChild("Gamebeast"))

Gamebeast:Setup()
Tracking purchases
If your experience has in-game purchases, its important to track them accurately through the Gamebeast SDK.
See the :SendNewPurchaseGrantedMarker method to track purchases accurately.
Optionally retrying failed Markers
In the event that a marker fails to send to the Gamebeast Dashboard, the SDK has a callback method to notify you of failed markers. You can use this callback to retry sending failed markers if you want to ensure that all of your data gets to the dashboard.
See the :OnMarkersFailed method for more information on how to use this callback and retry failed markers.
Creating an API key
Next, we’ll need to configure the API key for your project. The SDK uses an SDK Key — a public key scoped to a single project that’s safe to ship inside your game.
To do this, we’ll need to go back to the project settings page on the dashboard.
- Navigate to the project settings page by clicking “Project Settings” on the left side of the dashboard.
- Create a new API key by pressing the “Create API Key” button.
- Copy the API key before closing the popup. Make sure to hold onto this because you won’t be able to see it again!
- In the Roblox Studio script, replace the placeholder key with the API key you just created.
key = "abcd-efgh-1234-5678", -- Replace with your API key.And that’s it! You’re now ready to start sending data to the Gamebeast dashboard.
To start using the SDK in your code, check out the SDK Services documentation.